Introduction
The first time I tried making Sweet and Sour Chicken at home, I thought, “How hard can it be?” Famous last words. I cranked the heat too high, blinked, and suddenly my cornstarch turned into sticky confetti while the sauce decided to be syrupy in all the wrong ways. Oops. But the smell of garlic hitting hot oil? That carried me through. It was bright, tangy, a little nostalgic—like Friday night takeout but in my slippers.
To be real, this dish has become one of my go-to easy weeknight dinners because it’s a total crowd-pleaser and super flexible. It leans into healthy comfort food territory while still giving you those restaurant-style crispy edges. And because it’s protein-forward, it’s also a quiet hero for high protein meals, best dinner prep meals, and even low calorie chicken meal prep when I pair it with steamed broccoli and jasmine rice. I love that I can make a big batch, portion it out for meal prep microwave lunches, and call it a win for my protein eating plan. As someone who craves fast, delicious, and budget-friendly recipes, this checks all those boxes.
The lighting I remember most was one cold evening when the kitchen window fogged up from the steam, the sauce went glossy right as the pineapple warmed through, and the peppers softened without losing their snap. I didn’t expect it to feel so satisfying. The sizzle of chicken pieces hitting the pan makes a tiny drumline of possibility. The tang of vinegar brightens the room, and the sweetness follows like a gentle echo. That balance—the crunchy, the sticky, the bright—is why I keep coming back to it for quick family meals and even “fancy” nights when I don’t want to be fancy.
What makes this version comforting and a little unique? The batter is light but crisp, the sauce is tangy without being cloying, and the veggies stay colorful and alive. It’s a dish that lets you riff: add heat for the spice lovers, more pineapple for the sweet crew, or extra garlic for, well, me. And while it’s takeout-inspired, it slides nicely into best meal prep healthy routines, plays well with a protein meal plan, and even adapts for high protein high carb low fat meals when served with rice, or a high protein keto meal plan vibe with cauliflower rice. Honestly, it’s a keeper.
Why You’ll Love This Recipe
It’s faster than takeout on a busy night. In about 30 minutes, you get a glossy, tangy, crispy plate of joy that fits nicely into best meal prep plans and good meal prep plans.
It’s crispy where it counts. The cornstarch-egg-flour combo delivers light, crunchy bites that soak up sauce without going soggy right away.
It’s endlessly customizable. Dial up the heat, add more pineapple, toss in snap peas or broccoli—this is a choose-your-own-adventure meal for healthy eating for two or a full family.
It reheats like a dream. That’s a big win for premade lunch meals and no prep healthy lunches when the fridge is your friend.
It’s kid-approved and adult-approved. The flavors are bold but balanced—the exact kind of dinner that feels like a hug in a bowl.
It plays well with your goals. Pair with rice for high protein high carb low fat meals, or with cauliflower rice for no prep keto meals vibes.
What Makes This Recipe Special?
The three-part coating—cornstarch, egg, then flour—gives a delicate, shatter-crisp exterior that doesn’t feel heavy. The sauce leans bright and tangy with balanced sweetness, and a cornstarch slurry ensures it coats every piece like lacquer. I stir-fry the vegetables just until tender-crisp, so the peppers keep their juicy bite and the onions stay sweet with a little edge. It’s a simple technique that turns into a restaurant-quality finish, the kind that makes you think, “Oh, this is why we cook at home.”
Ingredients
Boneless, skinless chicken breasts or thighs
I’ve used both and love both. Thighs stay extra juicy; breasts give you those neat, tidy cubes. Either way, this is the protein backbone for high macro meals and ready made protein meals—but homemade.
Cornstarch, eggs, all-purpose flour, salt, and pepper
This is the crunchy trio. Cornstarch first for cling and crisp, egg for glue, flour for structure. Seasoning at every step means the coating tastes good even before the sauce.
Bell peppers and onion
Color, crunch, sweetness. I usually grab red and green for that classic takeout palette. Cut them into chunks so they stay substantial and won’t disappear under the sauce.
Pineapple chunks (optional but highly encouraged)
The warm, juicy bites are little bursts of sunshine. Canned or fresh both work; just drain canned well so the sauce keeps its body.
Sugar and brown sugar
The combo creates sweetness with a hint of caramel depth. Using both keeps the sauce from feeling one-note.
Apple cider vinegar
Bright, fruity acidity that balances the sweet, giving you that signature tang. White vinegar works if that’s what you have.
Ketchup
It’s classic in sweet-and-sour sauce—adds body, a tangy tomato note, and a gorgeous color.
Low-sodium soy sauce
For savory backbone and salt. I like low-sodium so I can control seasoning.
Garlic
Minced and cooked briefly for fragrance. It wakes everything up.
Cornstarch slurry
A tablespoon of cornstarch whisked with water tightens the sauce and makes it cling like a dream.
Neutral oil for frying
Use something with a high smoke point. I go for avocado or canola. We’re shallow-frying, not deep-frying, so you don’t need a vat.
Don’t do this: don’t overcrowd the pan (you’ll steam, not crisp), don’t skip patting the chicken dry (moisture kills browning), and don’t pour the slurry into a boiling volcano without whisking (hello, lumps). Been there. Learned fast.
How to Make It Step-by-Step
Set yourself up. I set out three shallow bowls: one with cornstarch, one with beaten eggs, one with seasoned flour. A wire rack next to the stove helps keep finished chicken crisp. The pan heats while I prep, so it’s ready to go when I am.
Pat the chicken dry and season. Salt and pepper go on the chicken first so the flavor penetrates. I can hear the oil whispering in the skillet—ready but not smoking. That sound is your green light.
Coat the chicken in order: cornstarch, egg, flour. Shake off excess at each step. The pieces feel lightly padded, not thickly battered. That’s exactly what we want for a crisp-but-light bite.
Shallow-fry in batches over medium-high heat. The moment the chicken hits the oil, there’s a happy shimmer and an immediate sizzle. Let it be. Don’t poke constantly. Flip when the underside is golden. About 3–4 minutes per side will do it, but use that golden color as your real guide.
Drain on a rack or paper towels. The edges look lacy and delicate. If you want extra crunch, let the chicken rest 5 minutes and give it a second short fry. It’s a small step with big payoff.
Stir-fry the vegetables. In the same pan (wipe or swap oil if needed), I sauté peppers and onion just until they soften slightly but still bite back—about 3–4 minutes. The colors pop louder when they’re just tender-crisp.
Whisk the sauce separately. Ketchup, sugars, vinegar, soy sauce, garlic, and the cornstarch slurry. It should look smooth and glossy in the bowl. If it seems too thick, add a splash of water. Too thin? You can adjust later as it cooks.
Pour the sauce into the skillet. It starts as a shiny pool and quickly turns into a glossy glaze as it bubbles. The aroma is tangy-sweet with a garlicky halo that makes everyone wander into the kitchen asking, “Is it ready yet?”
Add the pineapple (if using). Those yellow jewels warm up and release juice right into the sauce. It’s like sunshine meeting tang.
Return the chicken to the pan. Toss gently to coat every nook and cranny. The sound changes—less sizzle, more sticky-sweet bubbling. That’s your cue that the sauce is clinging.
Simmer 2–3 minutes. The sauce thickens to coat the back of a spoon. Taste and adjust—more vinegar for brighter, more sugar for sweeter, a splash of soy if you want saltier depth. You’re the boss.
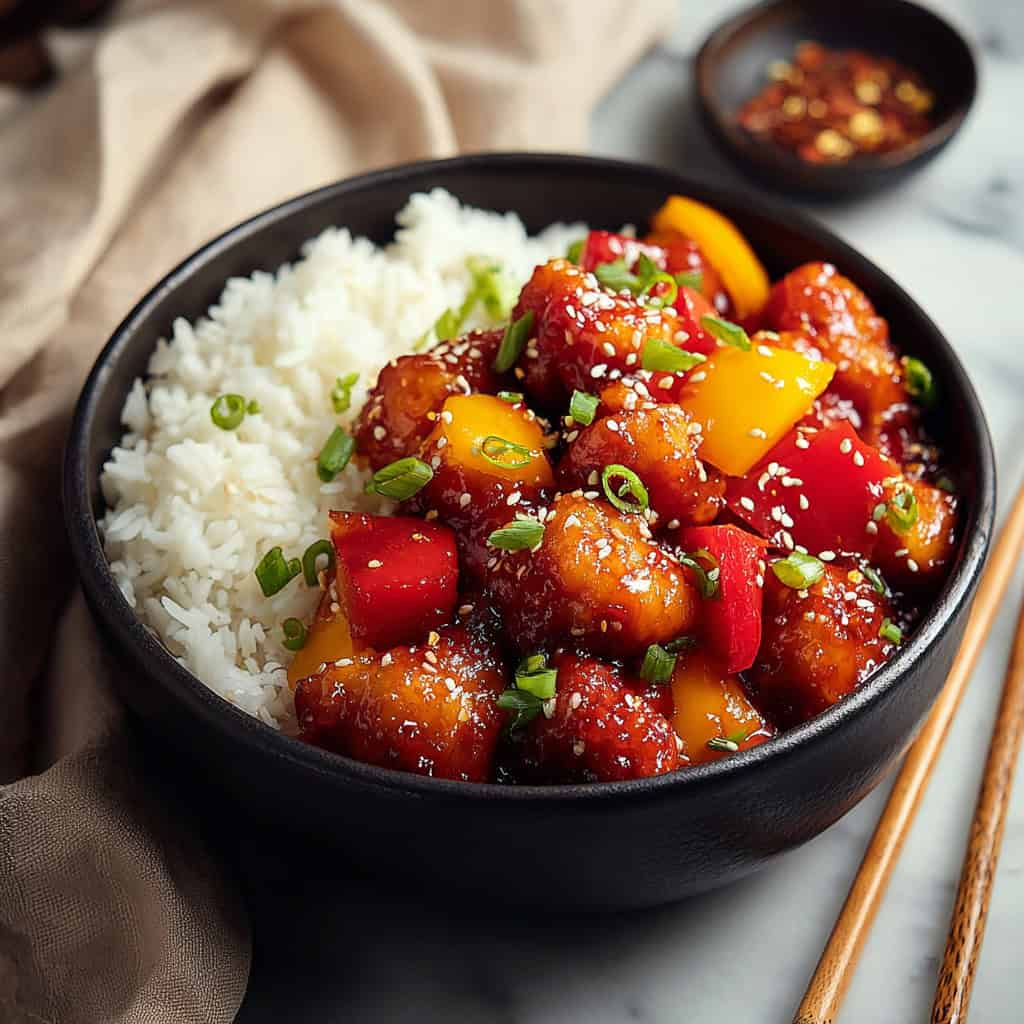
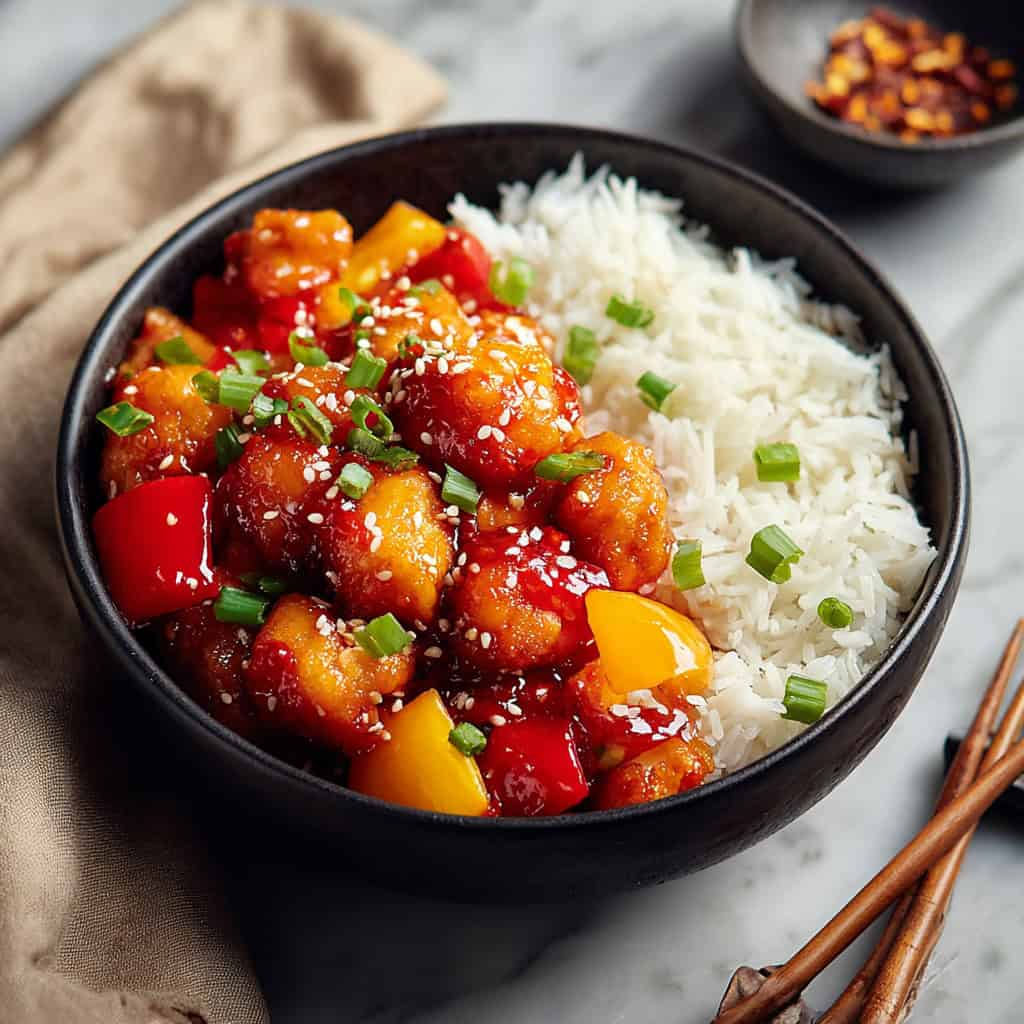
Serve immediately. I like it over fluffy jasmine rice, but noodles, quinoa, or cauliflower rice all work. The first bite is a crunch-snap followed by tangy warmth and a sweet finish. It’s the exact kind of dinner that fits best high protein ready meals energy—except it’s fresh, hot, and honest-to-goodness better than takeout.
Tips for Best Results
Pat everything dry—chicken and pineapple. Dry surfaces brown better, and dry pineapple won’t water down the sauce.
Fry in batches. If you crowd the pan, steam happens, and steam is the enemy of crisp. Give the chicken room to breathe.
Control the heat. Medium-high to fry, then medium to simmer the sauce. If the oil smokes, back off a little.
Add slurry to a warm—not violently boiling—sauce. A gentle simmer helps thicken without clumping.
Toss at the end. Coat the chicken in sauce just before serving so the crust stays lively. If you plan leftovers, sauce only what you’ll eat now.
Pick your base for your goals. Rice and noodles for high carb high protein low fat meals or high protein high carb low fat meals. Cauliflower rice or sautéed cabbage for keto meal plan and no prep keto meals days.
Ingredient Substitutions & Variations
Swap chicken thighs for extra juiciness. They’re great for best meals to prep because they reheat tender.
Make it spicier. Add red pepper flakes, chili-garlic paste, or a dash of sriracha to the sauce.
Go veggie-forward. Toss in broccoli florets, snap peas, carrots, or even zucchini. It becomes a colorful stir-fry that still fits healthy boxed meals vibes.
Lighter sauce. Cut the sugars slightly and lean on pineapple sweetness. Use a touch more vinegar and soy for balance.
Gluten-friendly notes. Use a gluten-free flour blend and a gluten-free soy sauce alternative.
Air-fryer or baked. Lightly oil the coated chicken and cook in the air fryer at 390°F until crisp, or bake at 375°F on a rack. You’ll trade a little shatter for less cleanup—worth it on super busy nights and helpful for low fat meal delivery style results at home.
Serving Suggestions
Fluffy jasmine or basmati rice to soak up every shiny drop. This is the classic pairing for quick family meals and best dinner prep meals.
Garlicky fried rice made from leftover rice and peas. It’s a sneaky way to make easy high protein high calorie meals feel extra special.
Sesame noodles or lo mein when you’re craving slurpable comfort.
Cauliflower rice for a lighter plate that still satisfies those high protein keto meal plan days.
Cucumber salad with rice vinegar and sesame seeds. Crunchy, fresh, and cooling with the tangy-sweet sauce.
Grilled pineapple spears for dessert, dusted with cinnamon. Pure sunshine.
Pairing Ideas (Drinks, Sides, etc.)
Sparkling water with lime and mint—bubbly, fresh, and perfect for cutting through richness.
Iced jasmine green tea—fragrant and clean.
Steamed edamame with sea salt—a simple, high-protein nibble that supports high protein microwave meals style eating without the microwave.
Roasted broccoli with a squeeze of lemon—bright, simple, and weeknight-friendly.
How to Store and Reheat Leftovers
Cool completely before storing. In the fridge, leftovers last up to 3 days. I often portion them in single-serve containers for premade lunch meals that are grab-and-go.
Reheat gently on the stovetop over low to medium heat. Add a splash of water to loosen the sauce so it returns to glossy instead of sticky-stiff. Stir occasionally until hot.
Microwave method for meal prep microwave lunches: warm at 60% power in bursts, stirring between rounds. High power can overcook the chicken and make the sauce angry.
If you know you’ll have leftovers, keep some chicken pieces unsauced. Re-crisp in a hot skillet with a film of oil, then add sauce at the end. It’s worth the tiny bit of planning.
Make-Ahead and Freezer Tips
Make the sauce in advance. Store up to a week in the fridge. It thickens slightly as it sits; whisk in a spoonful of water when heating.
Batch the chicken. Coat and shallow-fry, then cool completely and freeze on a baking sheet before transferring to a freezer bag. Re-crisp in a 400°F oven or hot skillet, then toss in fresh-warmed sauce.
Freeze sauce and chicken separately. This keeps the chicken from going soggy and the sauce from breaking. It’s a great route for ready meals for 2 or prepared meals for two you can assemble fast.
Common Mistakes to Avoid
Overcrowding the skillet. It’s the number-one reason chicken doesn’t crisp. Cook in batches and be patient.
Skipping the dry pat. Moist chicken equals sad, pale coating. Pat it dry, every time.
Pouring slurry into a rolling boil. That’s a fast track to lumpy sauce. Aim for a gentle simmer and whisk.
Saucing too early. If you want the crispiest bites, toss the chicken in sauce just before serving.
Under-seasoning the coating. A tiny pinch of salt in the flour and cornstarch makes a difference.
Frequently Asked Questions (FAQ)
Can I bake or air-fry the chicken instead of frying?
Yes. Bake on a rack at 375°F until crisp or air-fry at 390°F, flipping once. It’s a great option for best meal prep healthy goals.
How do I keep the chicken crispy after saucing?
Toss right before serving and don’t drown it. You can also reserve some extra sauce for drizzling at the table.
Can I make the sauce less sweet?
Absolutely. Reduce the sugars slightly, add more vinegar for tang, and lean on pineapple’s natural sweetness if using.
What vegetables work best?
Bell peppers and onion are classic, but broccoli, snap peas, carrots, and even canned baby corn work well. Keep the pieces chunky so they don’t disappear.
Can I make this gluten-free?
Yes. Use a gluten-free flour blend and a gluten-free soy sauce alternative. Cornstarch is naturally gluten-free.
Is this good for meal prep?
Definitely. Portion into containers with rice or veggies for healthy meal plans for two or solo protein meal plan weeks. Reheat gently for the best texture.
Cooking Tools You’ll Need
Large skillet or wok with high sides for stir-frying and saucing.
Wire rack set over a sheet pan to keep chicken crisp after frying.
Tongs for flipping without tearing the coating.
Mixing bowls for dredging stations and sauce.
Whisk for a lump-free slurry and glossy sauce.
Instant-read thermometer for oil and for checking doneness when needed.
Final Thoughts
Sweet and Sour Chicken is one of those dishes that makes an ordinary night feel a little celebratory. It’s the sound of a happy kitchen, the shine of a perfect glaze, and the color-pop of peppers and pineapple that makes everyone hover with a spoon. I love that it’s forgiving and playful—my kind of dinner. Some nights I keep it classic. Other nights I sneak in broccoli, turn up the heat, or go heavier on the vinegar because I’m in a tangy mood. Either way, it fits into my rhythm of budget-friendly recipes, best meals to prep, and healthy meal plans for two when life is moving fast.
There’s a quiet confidence that comes with a dish you can make by muscle memory—the dip, the sizzle, the toss. It turns chaos into calm and feels like a hug in a bowl every single time. If you try it, I hope it fills your kitchen with the same warmth and a little bit of that takeout-night sparkle.
If you enjoyed this recipe, don’t forget to save it on Pinterest or share it with a friend!
Sweet and Sour Chicken
Ingredients
- 1 1/2 pounds boneless, skinless chicken breasts or thighs, cut into 1-inch pieces
- salt and black pepper, to taste
- 1/2 cup cornstarch, for dredging
- 2 large eggs, beaten
- 1/2 cup all-purpose flour
- neutral oil (canola or avocado) for shallow frying
- 1 red bell pepper, cut into 1-inch chunks
- 1 green bell pepper, cut into 1-inch chunks
- 1 small yellow or white onion, cut into 1-inch chunks
- 1 cup pineapple chunks, well drained (optional)
- 1/2 cup ketchup
- 1/2 cup rice vinegar (or apple cider vinegar)
- 1/2 cup granulated sugar
- 1/4 cup low-sodium soy sauce
- 1 teaspoon garlic powder (or 2 cloves garlic, minced)
- 1 tablespoon cornstarch, mixed with 2 tablespoons water (slurry)
Instructions
- Set up three shallow bowls: one with cornstarch, one with beaten eggs, and one with flour seasoned lightly with salt and pepper. Place a wire rack or paper-towel-lined plate nearby.
- Pat chicken very dry with paper towels. Season with salt and pepper. Dredge in cornstarch, dip in egg, then coat in flour, shaking off excess at each step.
- Heat about 1/2 inch of neutral oil in a large skillet or wok over medium-high heat until shimmering. Fry chicken in batches, 3–4 minutes per side, until golden and cooked through (165°F). Transfer to the rack to drain.
- Discard most of the frying oil, leaving about 1 tablespoon in the pan. Add bell peppers and onion; sauté over medium-high heat 3–4 minutes until slightly tender but still crisp.
- In a bowl, whisk together ketchup, vinegar, sugar, soy sauce, garlic powder, and the cornstarch slurry until smooth.
- Pour the sauce into the skillet with the vegetables. Cook, stirring, 2–3 minutes until glossy and thickened. Add pineapple chunks if using.
- Return fried chicken to the pan. Toss gently to coat every piece and simmer 2 minutes to heat through. Taste and adjust with a splash of vinegar for tang or a pinch of sugar for sweetness.
- Serve immediately over steamed rice or noodles. Garnish with sesame seeds or sliced scallions if desired.