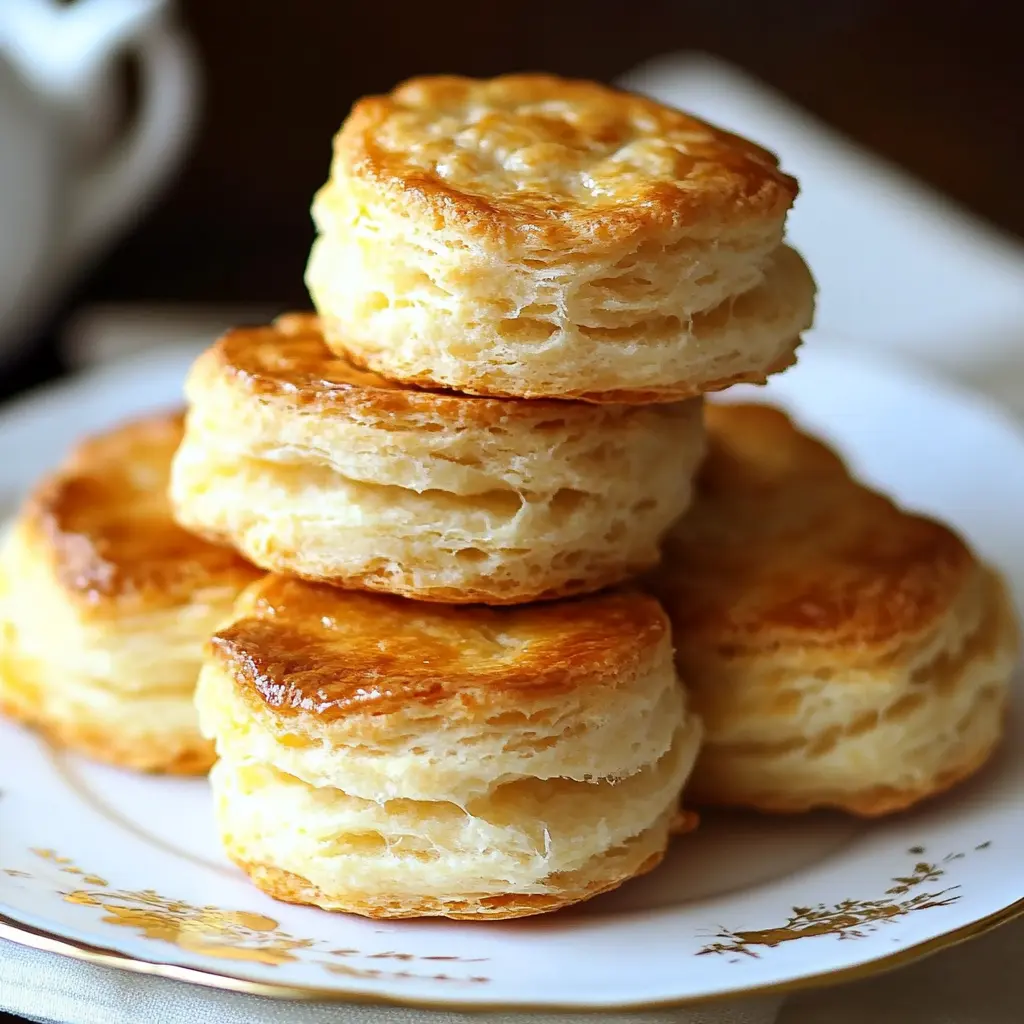

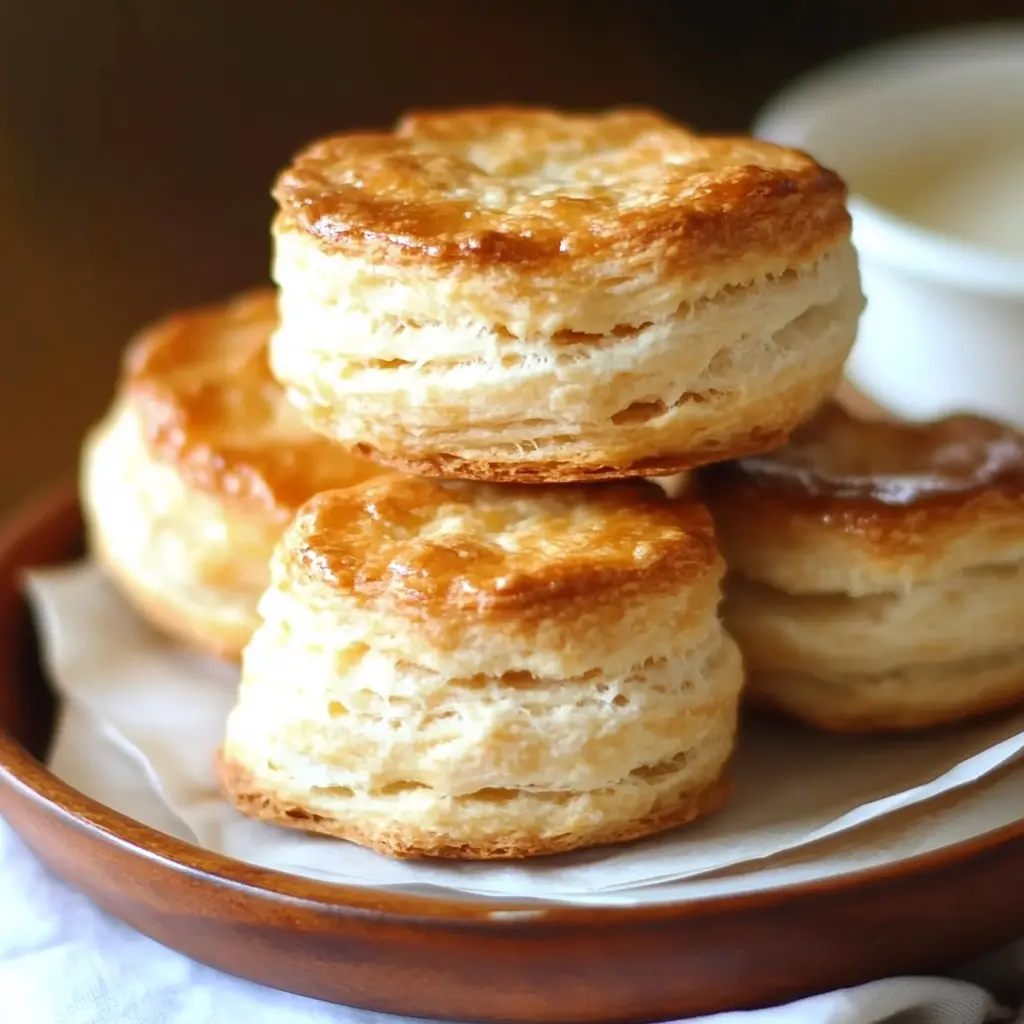
There’s nothing quite like the aroma of freshly baked biscuits wafting through your kitchen. These Melt-In-Your-Mouth Buttermilk Biscuits are the epitome of comfort food—flaky, buttery, and fluffy, with a golden crust that’s impossible to resist. Made with just a handful of simple ingredients and minimal prep time, these biscuits are perfect for breakfast, brunch, or as a side dish for any meal. Whether you’re a seasoned baker or a beginner, this recipe is easy to follow and guarantees delicious results every time.
Why You’ll Love These Melt-In-Your-Mouth Buttermilk Biscuits
Before we begin, here’s why this recipe stands out:
- Simple Ingredients: Made with pantry staples like flour, butter, and buttermilk.
- Minimal Effort: Quick prep time and straightforward steps make this recipe accessible for bakers of all skill levels.
- Irresistible Texture: Flaky layers, soft interiors, and a buttery flavor that melts in your mouth.
- Versatile: Perfect for pairing with soups, stews, jams, honey, or even as a base for breakfast sandwiches.
- Crowd-Pleasing: These biscuits are sure to be a hit at family meals, holiday gatherings, or potlucks.
Ready to embark on this buttery journey? Let’s explore the ingredients and detailed instructions.
Ingredients
(Tip: You’ll find the full list of ingredients and measurements in the recipe card below.)
Here’s what you’ll need to create these mouthwatering Melt-In-Your-Mouth Buttermilk Biscuits:
For the Biscuits:
- All-purpose flour: Provides structure and ensures a light, airy texture.
- Baking powder and baking soda: Work together to help the biscuits rise and become fluffy.
- Sugar: Adds a touch of sweetness to balance the savory flavors.
- Salt: Enhances the overall taste and balances the richness of the butter.
- Chilled butter: Creates flaky layers as it melts during baking.
- Chilled buttermilk: Adds moisture and reacts with the leavening agents for a tender crumb.
These simple yet essential ingredients come together to create biscuits that are both satisfying and comforting. Now, let’s move on to the step-by-step instructions.
Step-by-Step Instructions
Follow these detailed steps to make the most delicious Melt-In-Your-Mouth Buttermilk Biscuits.
Step 1: Preheat the Oven
Preheat your oven to 450°F (230°C). A hot oven ensures the biscuits bake quickly, creating a golden crust while keeping the inside soft and fluffy.
Pro Tip: Place your baking sheet or cast-iron skillet in the oven while it preheats. This helps the biscuits bake evenly from the bottom.
Step 2: Prepare Your Ingredients
Measure out all your ingredients before starting. It’s crucial to keep the butter and buttermilk chilled until you’re ready to use them. Cold butter is key to achieving those flaky layers.
Pro Tip: Freeze the butter for 10–15 minutes before grating it. Grated butter incorporates more easily into the dough and ensures even distribution.
Step 3: Mix the Dry Ingredients
In a large mixing bowl, whisk together the all-purpose flour, baking powder, baking soda, sugar, and salt. Whisking ensures the leavening agents and seasonings are evenly distributed throughout the flour.
Pro Tip: Sift the dry ingredients together for an extra-light texture.
Step 4: Cut in the Butter
Add the chilled, grated butter to the dry ingredients. Use a pastry cutter, fork, or your fingers to cut the butter into the flour mixture until it resembles coarse crumbs. Some pea-sized butter pieces are okay—they’ll create pockets of steam during baking, resulting in flaky layers.
Pro Tip: If using your fingers, work quickly to prevent the butter from warming up too much.
Step 5: Add the Buttermilk
Make a well in the center of the flour mixture and pour in the chilled buttermilk. Stir gently with a wooden spoon or spatula until the dough just comes together. Be careful not to overmix—overworking the dough can lead to tough biscuits.
Pro Tip: If the dough seems too dry, add an additional tablespoon of buttermilk, one teaspoon at a time.
Step 6: Shape the Dough
Turn the dough out onto a lightly floured surface. Gently pat it into a rectangle about 1-inch thick. Fold the dough in half, then pat it down again. Repeat this process 2–3 times to create layers, which contribute to the biscuits’ flakiness.
Pro Tip: Use a bench scraper to lift and fold the dough—it prevents sticking and makes handling easier.
Step 7: Cut the Biscuits
Use a round biscuit cutter (or the rim of a glass) to cut out biscuits. Press straight down without twisting—the twisting motion can seal the edges and prevent the biscuits from rising properly.
Pro Tip: Gather the scraps, pat them together gently, and cut out additional biscuits. Avoid overworking the dough.
Step 8: Bake the Biscuits
Place the biscuits on the preheated baking sheet or cast-iron skillet, leaving about 1 inch of space between each biscuit. Brush the tops with a little buttermilk or melted butter for a golden finish.
Bake in the preheated oven for 12–15 minutes, or until the biscuits are golden brown on top and cooked through. Rotate the pan halfway through baking to ensure even browning.
Pro Tip: For softer sides, place the biscuits close together on the baking sheet so they touch while baking.
Step 9: Cool and Serve
Remove the biscuits from the oven and let them cool slightly on a wire rack. Serve them warm with your favorite toppings, such as butter, honey, jam, or gravy.
Pro Tip: Split the biscuits open while they’re still warm to enjoy their soft, fluffy interior.
Serving Suggestions and Pairings
These Melt-In-Your-Mouth Buttermilk Biscuits are incredibly versatile and pair beautifully with a variety of accompaniments:
- Breakfast: Serve with scrambled eggs, sausage, or bacon for a hearty start to your day.
- Brunch: Pair with fresh fruit, yogurt, or a salad for a balanced meal.
- Dinner: Use as a side dish with soups, stews, or roasted meats.
- Dessert: Top with whipped cream and fresh berries for a sweet treat.
Storage and Reheating Tips
Storage:
- Room Temperature: Store the biscuits in an airtight container at room temperature for up to 2 days.
- Refrigeration: Keep in the refrigerator for up to 5 days. Reheat before serving to restore their flakiness.
- Freezing: Freeze unbaked biscuits on a baking sheet, then transfer them to a freezer-safe bag or container for up to 3 months. Bake directly from frozen, adding 2–3 minutes to the baking time.
Reheating:
- To refresh the biscuits, warm them in the oven at 350°F (175°C) for 5–7 minutes.
- For a quick option, microwave individual biscuits for 10–15 seconds, but note that the texture may soften slightly.
Pro Tip: Brush reheated biscuits with melted butter for an extra burst of flavor.
Frequently Asked Questions (FAQs)
Q: Can I use regular milk instead of buttermilk?
A: Yes! Make a substitute by mixing 1 cup of whole milk with 1 tablespoon of lemon juice or white vinegar. Let it sit for 5–10 minutes until curdled.
Q: Can I make these biscuits gluten-free?
A: Substitute the all-purpose flour with a gluten-free flour blend and ensure all other ingredients are certified gluten-free.
Q: Why didn’t my biscuits rise?
A: This can happen if the butter wasn’t cold enough or if the dough was overmixed. Ensure the butter is grated and chilled, and handle the dough as little as possible.
Q: Can I use margarine instead of butter?
A: While margarine can work, butter provides superior flavor and texture. For best results, stick with real butter.
Q: How do I make the biscuits extra flaky?
A: Grate the butter and fold the dough 2–3 times during shaping to create distinct layers.
Q: What’s the best way to store leftover biscuits?
A: Store them in an airtight container at room temperature for short-term storage or freeze them for longer shelf life.
Variations to Try
- Cheesy Herb Biscuits: Add shredded cheddar cheese and chopped herbs like chives or rosemary to the dough.
- Sweet Biscuits: Increase the sugar to 3 tablespoons and sprinkle cinnamon sugar on top before baking.
- Drop Biscuits: Skip the rolling and cutting—drop spoonfuls of dough onto the baking sheet for a rustic look.
- Gluten-Free Option: Use a gluten-free flour blend and add 1/2 teaspoon of xanthan gum for structure.
Final Thoughts
These Melt-In-Your-Mouth Buttermilk Biscuits are the ultimate comfort food—warm, buttery, and oh-so-flaky. Whether you’re serving them for breakfast, brunch, or dinner, these biscuits are sure to bring smiles and satisfaction. By following the detailed instructions, storage tips, and customization ideas provided here, you’ll be able to create a dish that’s as beautiful as it is delicious.
So, gather your ingredients, embrace the simplicity of this recipe, and treat yourself to a taste of homemade indulgence anytime you’d like. Enjoy every bite of these melt-in-your-mouth biscuits—you deserve it!

Melt-In-Your-Mouth Buttermilk Biscuits
Ingredients
- 3 cups all-purpose flour
- 1 1/2 tablespoons baking powder
- 1 teaspoon baking soda
- 1 1/2 – 2 tablespoons sugar (adjust to taste)
- 1 1/2 teaspoons salt
- 3/4 cup unsalted butter, chilled (1 1/2 sticks, 180 g)
- 1 1/4 cups buttermilk, chilled (300 mL)
Instructions
- Preheat your oven to 450°F (230°C). If using a baking sheet, line it with parchment paper. For a cast-iron skillet, place it in the oven to preheat.
- In a large mixing bowl, whisk together the flour, baking powder, baking soda, sugar, and salt until evenly combined.
- Grate the chilled butter using a box grater, then add it to the dry ingredients. Use a pastry cutter, fork, or your fingers to cut the butter into the flour mixture until it resembles coarse crumbs with pea-sized butter pieces.
- Make a well in the center of the mixture and pour in the chilled buttermilk. Stir gently with a wooden spoon or spatula until the dough just comes together. Avoid overmixing.
- Turn the dough out onto a lightly floured surface. Gently pat it into a rectangle about 1-inch thick. Fold the dough in half, then pat it down again. Repeat this process 2–3 times to create layers.
- Use a round biscuit cutter (or the rim of a glass) to cut out biscuits. Press straight down without twisting to ensure the biscuits rise evenly.
- Place the biscuits on the prepared baking sheet or preheated cast-iron skillet, leaving about 1 inch of space between each biscuit. Brush the tops with a little buttermilk or melted butter for a golden finish.
- Bake in the preheated oven for 12–15 minutes, or until the biscuits are golden brown on top and cooked through. Rotate the pan halfway through baking for even browning.
- Remove the biscuits from the oven and let them cool slightly on a wire rack. Serve warm with butter, honey, jam, or your favorite toppings.