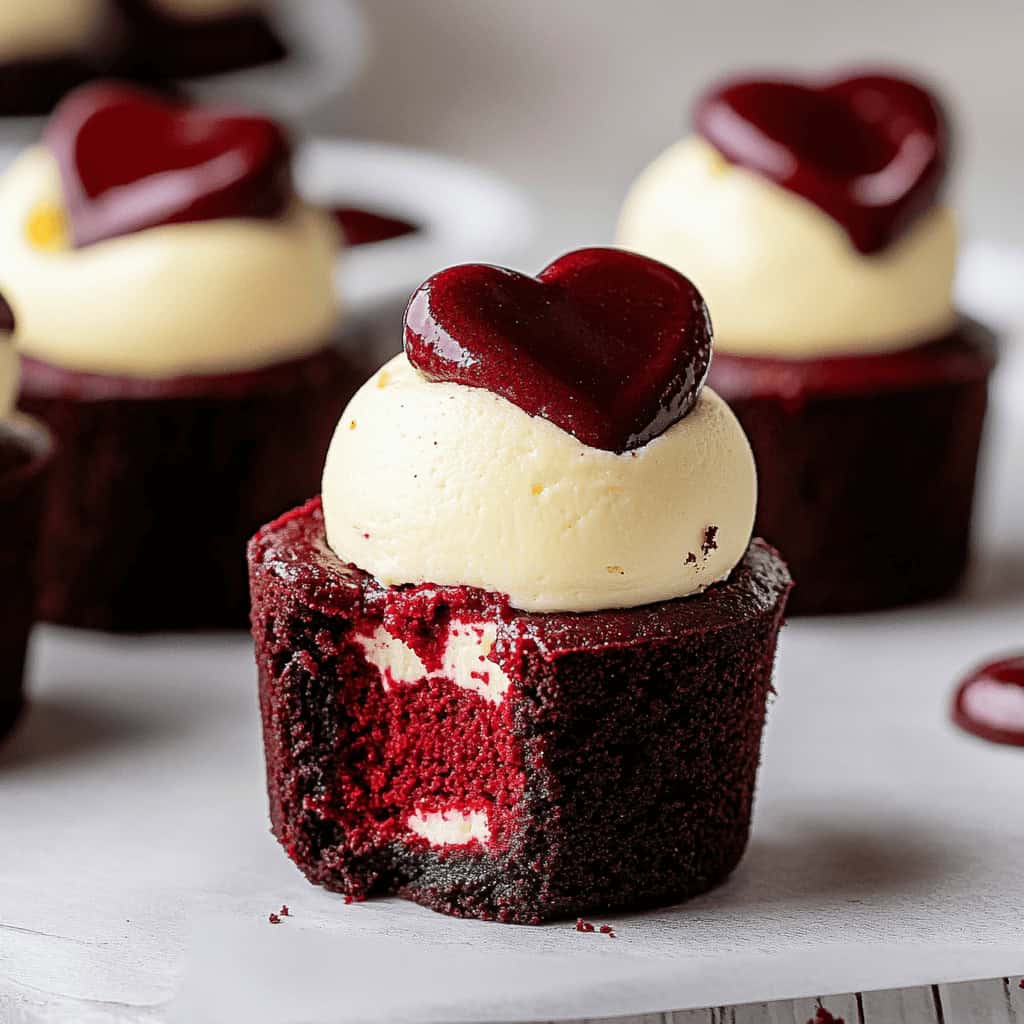
Mini Red Velvet Cheesecakes are the perfect bite-sized treat for holidays, special gatherings, or even a romantic night in. These decadent desserts feature a soft, velvety red cake base topped with a rich and creamy cheesecake layer, all crowned with a swirl of freshly whipped cream. Their vibrant color and irresistible flavor make them a showstopper for any dessert table. Best of all, they’re easy to prepare and sure to impress your family and friends!
Ingredients
(Tip: You’ll find the full list of ingredients and measurements in the recipe card below.)
For the Red Velvet Base:
- ½ cup all-purpose flour
- 1 tablespoon unsweetened cocoa powder
- ¼ teaspoon baking soda
- ⅛ teaspoon salt
- ¼ cup unsalted butter, softened
- ½ cup granulated sugar
- 1 large egg
- 1 teaspoon vanilla extract
- ¼ cup buttermilk
- 1 teaspoon red food coloring
For the Cheesecake Layer:
- 8 oz cream cheese, softened
- ¼ cup granulated sugar
- 1 large egg
- 1 teaspoon vanilla extract
For the Topping:
- ½ cup heavy whipping cream
- 2 tablespoons powdered sugar
- ½ teaspoon vanilla extract
- Red velvet cake crumbs (optional, for garnish)
How to Make Mini Red Velvet Cheesecakes
Step 1: Prepare the Red Velvet Base
- Preheat the oven to 350°F (175°C). Line a 12-cup muffin tin with paper liners for easy removal.
- In a small bowl, whisk together the flour, cocoa powder, baking soda, and salt. This will ensure the dry ingredients are evenly combined. Set aside.
- In a large mixing bowl, beat the softened butter and granulated sugar until the mixture becomes light and fluffy. This step helps create a tender texture for the cake base.
- Add the egg and vanilla extract, mixing well to incorporate.
- Gradually add the dry ingredients to the wet ingredients, alternating with buttermilk. Stir in the red food coloring until the batter is evenly tinted.
- Spoon about 1 tablespoon of the red velvet batter into each muffin cup, smoothing it out to form a flat layer.
Step 2: Prepare the Cheesecake Filling
- In a medium bowl, beat the softened cream cheese and sugar until the mixture is smooth and creamy.
- Add the egg and vanilla extract, mixing until just combined. Avoid overmixing, as this can introduce too much air into the batter, which may cause cracks in the cheesecake.
- Divide the cheesecake batter evenly among the muffin cups, covering the red velvet base. Fill each liner almost to the top.
Step 3: Bake and Cool
- Place the muffin tin in the preheated oven and bake for 18–20 minutes. The cheesecakes should be set around the edges with a slight jiggle in the center.
- Remove from the oven and let them cool in the pan for about 15 minutes. Then transfer them to a wire rack to cool completely.
- Refrigerate the cheesecakes for at least 2 hours before serving. Chilling allows the flavors to develop and gives the cheesecake its signature creamy texture.
Step 4: Whipped Cream Topping
- In a chilled mixing bowl, beat the heavy whipping cream, powdered sugar, and vanilla extract until stiff peaks form. This should take about 2–3 minutes using an electric mixer on high speed.
- Transfer the whipped cream into a piping bag fitted with a decorative tip. Pipe a swirl of whipped cream onto each mini cheesecake.
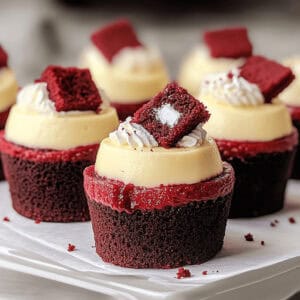
- Garnish with red velvet cake crumbs for an elegant touch, if desired.
Serving and Storage Tips
How to Serve Mini Red Velvet Cheesecakes
- These cheesecakes taste best when served chilled. The contrast between the cool, creamy cheesecake and the soft red velvet base makes each bite irresistible.
- Pair them with coffee, tea, or hot cocoa for an indulgent dessert experience.
How to Store
- Store the mini cheesecakes in an airtight container in the refrigerator for up to 4 days.
- If making in advance, skip the whipped cream topping and add it just before serving for the freshest taste.
Can You Freeze Mini Red Velvet Cheesecakes?
- Yes! These cheesecakes freeze well. Place them in a single layer in an airtight container and freeze for up to 2 months.
- When ready to eat, let them thaw in the refrigerator overnight before adding the whipped cream topping.
Frequently Asked Questions
1. Can I make these cheesecakes without red food coloring?
Absolutely! If you prefer to skip the food coloring, the cheesecakes will still taste delicious, but they won’t have the classic red velvet hue.
2. How do I prevent cracks in the cheesecake layer?
To avoid cracks:
- Do not overmix the cheesecake batter.
- Bake at the correct temperature and avoid opening the oven door frequently.
- A slight jiggle in the center is normal; the cheesecakes will set as they cool.
3. Can I make these in a mini muffin pan?
Yes! To make bite-sized cheesecakes, use a mini muffin pan with liners and reduce the baking time to 10–12 minutes. This will yield adorable, poppable cheesecakes perfect for parties.
4. Can I use store-bought whipped cream instead?
Of course! Store-bought whipped cream is a great time-saving option. However, homemade whipped cream provides a fresher taste and a better texture for piping.
These Mini Red Velvet Cheesecakes are not only visually stunning but also irresistibly delicious. Their combination of soft cake, creamy cheesecake, and fluffy whipped cream makes them a perfect dessert for any occasion. Whether you’re serving them at a festive gathering or indulging in a homemade treat, they’re guaranteed to be a hit!
Mini Red Velvet Cheesecakes
Ingredients
- 1/2 cup all-purpose flour
- 1 tablespoon unsweetened cocoa powder
- 1/4 teaspoon baking soda
- 1/8 teaspoon salt
- 1/4 cup unsalted butter, softened
- 1/2 cup granulated sugar
- 1 large egg
- 1 teaspoon vanilla extract
- 1/4 cup buttermilk
- 1 teaspoon red food coloring
- 8 oz cream cheese, softened
- 1/4 cup granulated sugar
- 1 large egg
- 1 teaspoon vanilla extract
- 1/2 cup heavy whipping cream
- 2 tablespoons powdered sugar
- 1/2 teaspoon vanilla extract
Instructions
- Preheat the oven to 350°F (175°C) and line a 12-cup muffin pan with paper liners.
- In a small bowl, whisk together flour, cocoa powder, baking soda, and salt. Set aside.
- In a large bowl, beat butter and sugar until light and fluffy. Add egg and vanilla extract, mixing well.
- Gradually add dry ingredients, alternating with buttermilk. Stir in red food coloring until well combined.
- Spoon about 1 tablespoon of batter into each muffin cup and spread evenly.
- In another bowl, beat cream cheese and sugar until smooth. Add egg and vanilla, mixing until just combined.
- Spoon cheesecake mixture over the red velvet bases, filling cups almost to the top.
- Bake for 18–20 minutes or until cheesecake is set but slightly jiggly in the center.
- Cool completely, then refrigerate for at least 2 hours before serving.