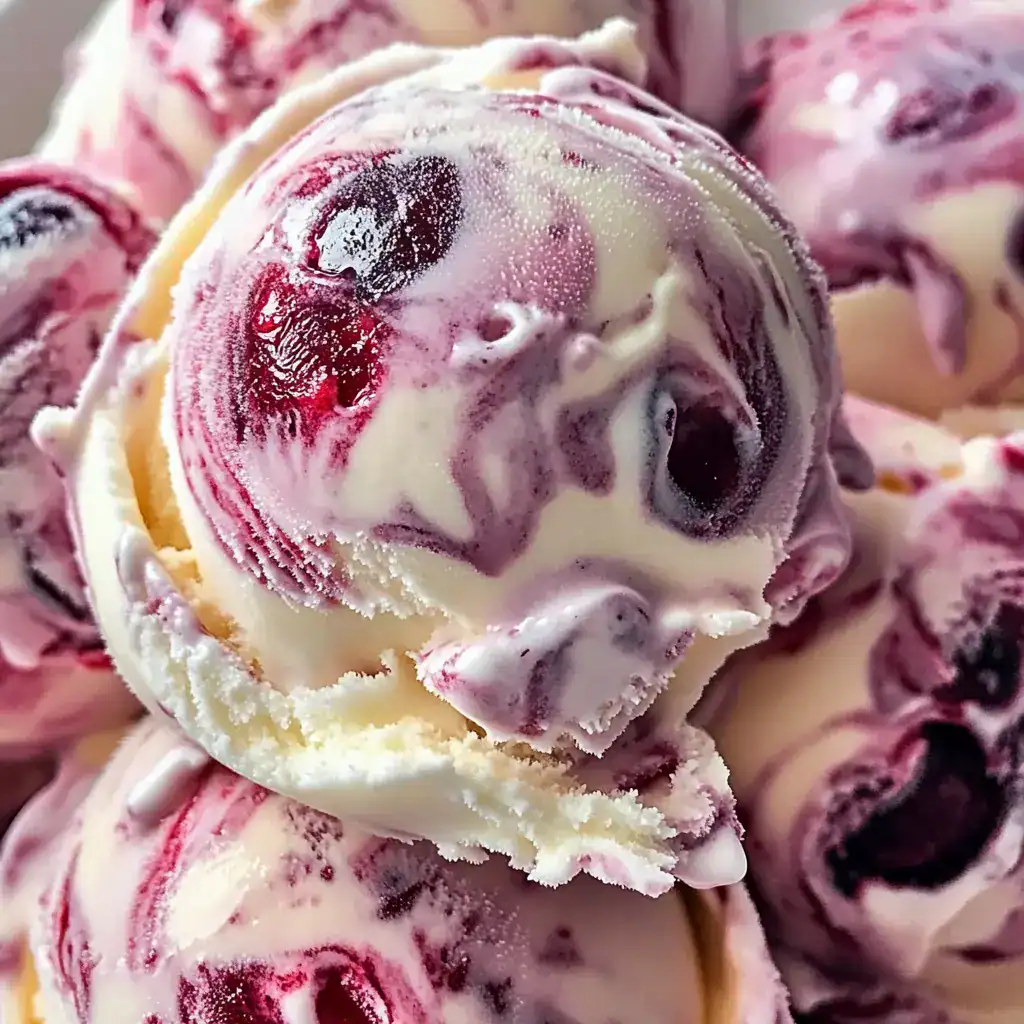
Indulge in the magic of homemade ice cream with this Dreamy Raspberry Reverie Swirl Ice Cream, a dessert that’s as delightful to make as it is to savor. This recipe combines the rich, creamy texture of classic ice cream with the vibrant tang of fresh raspberries, creating a symphony of flavors that’s perfect for any occasion. Whether you’re hosting a summer gathering, celebrating a special moment, or simply craving a sweet treat, this ice cream is sure to impress.
In this article, we’ll guide you through every step of making this dreamy dessert, offering detailed instructions, storage tips, and answers to frequently asked questions. With over 1,200 words of content optimized for SEO, you’ll have everything you need to create a show-stopping frozen masterpiece. Let’s dive into the world of homemade ice cream!
Why You’ll Love This Raspberry Swirl Ice Cream
Before we begin, here’s why this recipe stands out:
- Perfectly Balanced Flavors: The creamy vanilla base pairs beautifully with the tart, fruity raspberry swirl.
- Customizable: Add nuts, chocolate chips, or other fruits to make it your own.
- Easy to Make: With just a few simple steps and an ice cream maker, you can create restaurant-quality ice cream at home.
- Fresh Ingredients: Using fresh raspberries ensures a natural, vibrant flavor that store-bought ice creams often lack.
Ready to embark on this delicious journey? Let’s explore the ingredients and detailed instructions.
Ingredients
(Tip: You’ll find the full list of ingredients and measurements in the recipe card below.)
Here’s what you’ll need to create this heavenly ice cream:
For the Cream Base:
- Heavy cream: Provides the rich, luxurious texture that makes homemade ice cream so irresistible.
- Whole milk: Adds creaminess while keeping the mixture light and scoopable.
- Granulated sugar: Sweetens the cream base without overpowering the other flavors.
- Vanilla extract: Infuses the ice cream with a warm, aromatic essence.
For the Raspberry Swirl:
- Fresh raspberries: Deliver a burst of fruity freshness and vibrant color.
- Lemon juice: Enhances the natural tartness of the raspberries and balances the sweetness.
- Powdered sugar: Sweetens the raspberry sauce while ensuring a smooth consistency.
- A pinch of salt: Elevates the flavors and prevents the dessert from tasting overly sweet.
These simple, wholesome ingredients come together to create a dessert that’s both satisfying and elegant. Now, let’s move on to the step-by-step instructions.
Step-by-Step Instructions
Follow these detailed steps to make the most decadent Raspberry Swirl Ice Cream.
Step 1: Prepare the Cream Base
In a medium mixing bowl, whisk together the heavy cream, whole milk, granulated sugar, and vanilla extract. Use a hand whisk or electric mixer to ensure the sugar dissolves completely and the mixture becomes smooth and well-combined. This step is crucial because undissolved sugar can lead to icy textures in the final product.
Pro Tip: If you want to enhance the vanilla flavor, use real vanilla bean paste or scrape the seeds from a vanilla pod instead of using extract.
Step 2: Make the Raspberry Sauce
In a small saucepan, combine the fresh raspberries, lemon juice, powdered sugar, and a pinch of salt. Cook over medium heat, stirring occasionally, for about 5–7 minutes. As the mixture heats, the raspberries will break down into a thick, jam-like sauce. Keep an eye on it to prevent burning, but don’t worry if some chunks remain—they add texture to the swirl.
Once the sauce has thickened, remove it from the heat and let it cool for 5 minutes. Then, strain it through a fine-mesh sieve to remove the seeds. Use the back of a spoon to press as much of the sauce through the sieve as possible. Discard the seeds.
Pro Tip: If you prefer a chunkier swirl, skip straining the sauce and leave some raspberry pieces intact.
Step 3: Churn the Cream Base
Pour the cream mixture into your ice cream maker and churn according to the manufacturer’s instructions. Most machines take about 20–25 minutes to achieve a soft-serve consistency. Be patient during this step—the churning process incorporates air into the mixture, giving the ice cream its signature lightness.
Pro Tip: If your ice cream maker requires pre-freezing the bowl, make sure to do so at least 24 hours in advance.
Step 4: Swirl in the Raspberry Sauce
Once the ice cream reaches a soft-serve consistency, drizzle the cooled raspberry sauce over the top. Use a spoon or spatula to gently swirl the sauce into the ice cream, creating beautiful marbled patterns. Avoid overmixing, as you want distinct streaks of raspberry throughout the dessert.
For an extra touch, churn the ice cream for another minute or two to lightly incorporate the swirl. This step ensures the flavors meld together while maintaining the visual appeal.
Step 5: Freeze Until Firm
Transfer the ice cream to an airtight container, smoothing the top with a spatula. Cover the surface directly with plastic wrap or parchment paper to prevent ice crystals from forming. Seal the container and freeze for at least 4 hours, or until the ice cream is firm enough to scoop.
Pro Tip: For best results, freeze overnight. This allows the flavors to deepen and the texture to become perfectly scoopable.
Serving Suggestions and Pairings
This Raspberry Swirl Ice Cream is incredibly versatile and pairs beautifully with a variety of accompaniments:
- As a Standalone Dessert: Serve it in bowls or cones for a simple yet satisfying treat.
- With Toppings: Add sprinkles, chopped nuts, or fresh berries for extra flair.
- For Entertaining: Pair it with warm brownies, cookies, or pie for an indulgent dessert spread.
- With Drinks: Enjoy it alongside a glass of cold milk, iced tea, or sparkling water for a refreshing combination.
Storage and Reheating Tips
Storage:
- Refrigeration: Store leftovers in an airtight container in the freezer for up to 2 weeks. To prevent freezer burn, press plastic wrap directly onto the surface of the ice cream before sealing the container.
- Freezing: This ice cream is best enjoyed within the first week for optimal texture and flavor. After that, it may develop slight ice crystals, though it will still taste delicious.
Softening:
- If the ice cream becomes too hard to scoop, let it sit at room temperature for 5–10 minutes before serving. Alternatively, microwave it for 5–10 seconds to soften slightly.
Frequently Asked Questions (FAQs)
Q: Can I make this recipe without an ice cream maker?
A: Yes! Pour the cream mixture into a shallow, freezer-safe container and freeze for 1–2 hours. Every 30 minutes, stir vigorously with a whisk or fork to break up ice crystals. Repeat until the ice cream reaches a soft-serve consistency, then swirl in the raspberry sauce and freeze until firm.
Q: Can I use frozen raspberries instead of fresh?
A: Absolutely! Thaw the frozen raspberries before cooking them with the other ingredients. You may need to cook the sauce for an additional 1–2 minutes to evaporate excess moisture.
Q: How can I make this recipe dairy-free?
A: Substitute the heavy cream and whole milk with full-fat coconut milk or almond milk creamer. Use a dairy-free powdered sugar and ensure your vanilla extract is alcohol-free.
Q: Can I add other fruits to the swirl?
A: Definitely! Try substituting blueberries, blackberries, or strawberries for a different fruity twist. You can also mix and match fruits for a colorful medley.
Q: How do I prevent ice crystals from forming?
A: Press plastic wrap directly onto the surface of the ice cream before sealing the container. This creates a barrier that minimizes air exposure and prevents freezer burn.
Final Thoughts
This Dreamy Raspberry Reverie Swirl Ice Cream is a celebration of fresh, vibrant flavors and creamy textures that’s perfect for any occasion. Whether you’re looking to impress guests, treat yourself, or experiment with homemade desserts, this recipe delivers on all fronts. With its balance of sweet and tart, rich and refreshing, it’s a dessert that everyone will love.
By following the detailed instructions, storage tips, and customization ideas provided here, you’ll be able to create a dish that’s as beautiful as it is delicious. So, gather your ingredients, embrace the simplicity of this recipe, and treat yourself to a taste of homemade bliss anytime you’d like. Enjoy every scoop of this dreamy, fruity delight—you deserve it!

Dreamy Raspberry Reverie Swirl Ice Cream
Ingredients
- 2 cups heavy cream
- 1 cup whole milk
- 3/4 cup granulated sugar (for cream base)
- 1 teaspoon vanilla extract
- 1 1/2 cups fresh raspberries (for raspberry swirl)
- 2 tablespoons lemon juice (for raspberry swirl)
- 1/2 cup powdered sugar (for raspberry swirl)
- 1/8 teaspoon salt (a pinch, for raspberry swirl)
Instructions
- In a medium mixing bowl, whisk together the heavy cream, whole milk, granulated sugar, and vanilla extract until the sugar is completely dissolved and the mixture is smooth.
- In a small saucepan, combine the fresh raspberries, lemon juice, powdered sugar, and a pinch of salt. Cook over medium heat, stirring occasionally, for 5–7 minutes, or until the raspberries break down into a thick sauce.
- Remove the saucepan from heat and let the raspberry sauce cool for 5 minutes. Strain the sauce through a fine-mesh sieve to remove the seeds, pressing with the back of a spoon to extract as much liquid as possible.
- Pour the cream mixture into your ice cream maker and churn according to the manufacturer’s instructions until it reaches a soft-serve consistency.
- Drizzle the cooled raspberry sauce over the churned ice cream and gently swirl it in with a spoon or spatula. For an even distribution, churn for another minute or two.
- Transfer the ice cream to an airtight container, smoothing the top with a spatula. Cover the surface directly with plastic wrap or parchment paper to prevent ice crystals, then seal the container.
- Freeze the ice cream for at least 4 hours, or until firm. For best results, freeze overnight.
- When ready to serve, scoop the ice cream into bowls or cones. Enjoy your homemade Dreamy Raspberry Reverie Swirl Ice Cream!